Friday 20 June 2014

Wetsuit Review: 2014 Ladies' Rip Curl Flashbomb 5/3mm Chest Zip in Purple & Yellow

As a regular surfer and windsurfer in the UK, I wear a winter wetsuit pretty much all year round. I also tend to spend most of my time in the North Sea, which is a fair bit colder than the warm(ish) waters off the SW coast, so 5mm is my go-to thickness. But every time I come to shop for a new wetsuit, there never seem to be (m)any consumer reviews, especially of women's/ladies' wetsuits. Loads for the guys; hardly any for the girls :-( So, here's one to try to redress the balance. I'll add more in the days to come...


Model: 2014 Ladies' Rip Curl Flashbomb 5/3mm 
Entry: Chest zip
Colour: Purple, neon yellow, grey, black
Price: ~£260-280

The look: 

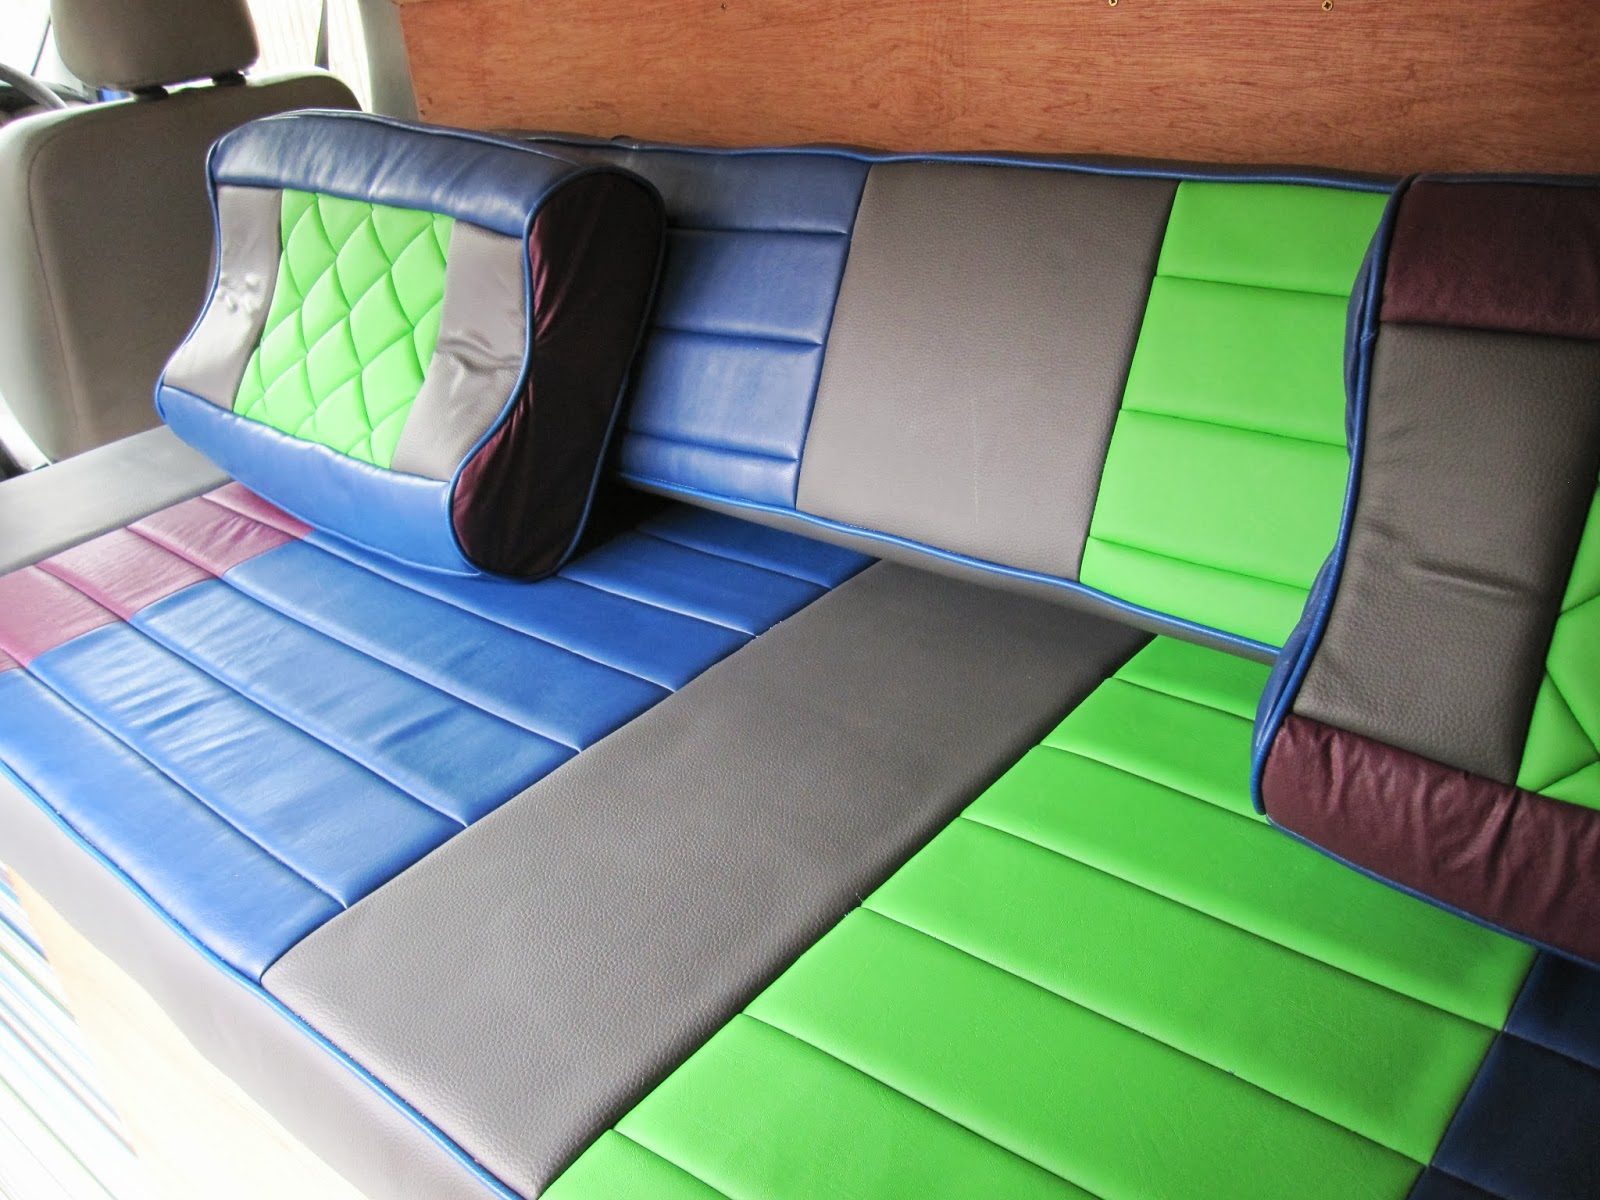
The colours are what really attracted me to this wetsuit; black may be flattering, but it's been so over done! Gone are the days where there was only a choice between black, or black with a few splashes of colour. On this suit, there's pale grey over the shoulders, a dark grey, wind-proof chest section, neon yellow (same colour as a hi-viz jacket) flashes under the arms and on the sides of the calves, and mostly purple legs. This is definitely a cool, sporty wetsuit that'll make you stand out from all those beach clones.

The design is moderately flattering, but could be improved. I like the shape of the rubberised chest part, but I feel it could be extended slightly to stop lower down and make my legs look longer. If it were wider over my boobs, it would also make them look bigger (and balance them more with my hips), but that would be at the expense of the yellow flash and would move the seams closer to the underarms. If you have massive jubblies and long legs, then none of that will matter. 

Rip Curl seem to like using the full-thickness, 5mm neoprene on the legs as well as the chest (O'Neill don't seem to do this). On the plus side, that means warm and toasty leggies no matter the weather, but on the minus, it makes them look like tree trunks. For my area of the world, you could get away with 3-4mm on some or all of the leg sections and they might look a bit less... upholstered(!) 


Another problem (resulting from all that thick neoprene) tends to manifest itself behind the knees. If you've ever had a long session in the water, the thick material can start to bunch there and rub, which is not pleasant! Would it be possible for a suit manufacturer to thin out the back-of-knee bits somehow??

The fit:

Here I was a bit disappointed. I'm normally a fairly standard UK size 8, if such a thing exists, but on Rip Curl's size chart I seem to fall between sizes 6 and 8. I'm 5'5", and was worried I'd be too tall and heavy for a 6, so I went for the 8 (sadly not many places seem to have the 6 in stock). When putting it on, it was just about snug enough around hips and chest, but really loose around my waist. 

As with so very many, many wetsuits, I find I have this big, loose and empty bit in the lower back area. This is a real problem with ladies' wetsuits that few makers ever seem to get right. Or perhaps I just have a big bottom and small waist. Hmm. I've had another Rip Curl wetsuit previously (a much cheaper model) and hoped that they might have improved the fitting, but alas, no. So far, the only wetsuit I've found that doesn't have this problem is my O'Neill D:Lux Mod. 

The length was good on me, however, and came down nicely over my ankles and there was no downward pull on my shoulders. Plenty of room around the shoulder area too, which is great for all that paddling and waterstarting. All seals were good around wrists and ankles.

The neck seal was good around my skinny neck, but I wonder how it would fare after a year's use. 

Getting in and out:

This is one of those described as 'chest-zip' entry, but you're essentially clambering in and out of the neck rather than the chest. If you've never had a chest-zip-entry wetty before, here are some tips: 1) Wear a long-sleeve, thin rash vest (not the thermal sort). This'll help slide the wetsuit off when it's time to get out (otherwise the neoprene just sticks to your arms and makes everything 10x more difficult); 2) These wetsuits are made with amazing superflex neoprene, so don't be too scared of stretching them to get in and out; 3) The drier it is, the easier I find it is to put on (dry it inside out) and 4) to get the damn thing off (and if, like me, you can't just pull it down over both of your shoulders) - ease down the sleeve on your non-dominant arm(!) by pulling the wrist seal over your hand and the shoulder part downward. This will take some time, but eventually you'll free your elbow, and the rest of that arm can come out. Next, you can roll the sleeve on your other arm downward and inside out, and the rest is easy. 

I've had chest-zip suits before, and this one was actually very easy to get into indeed. The neoprene is really light and really flexible, so no problems there. Getting out of it, however, was tough! The biggest problem was pulling the neck seal back over my head - I was really worried I'd break some of the stitching. I'm hoping that will improve with time and use. 

The features:

Super-flexible neoprene, which does help with getting in and out. I would say it's more flexible than the O'Neill suit I got a couple of years ago. 
E4 quick drying technology. My last suit took days on end to dry, so this one's a huuuuuge improvement and can dry completely in a couple of hours on a sunny day. 
Wrist and ankle seals are on the outside of the neoprene, and are about 1cm wide. At the moment they're good and tight, but I don't know how long they'll last. There are gaps in them to allow for stretching, which should help with their longevity. 
Woolly insulative layer. It does look and feel very toasty and fluffy. 


Taped seams. Apparently these are better for sealing out the water than other sorts of seams. 


S Flex knees. I had these on my old Rip Curl suit and they did last really well, whilst taking plenty of punishment, so that's a plus. Only minus is that they can sometimes look and feel a bit bulky. 


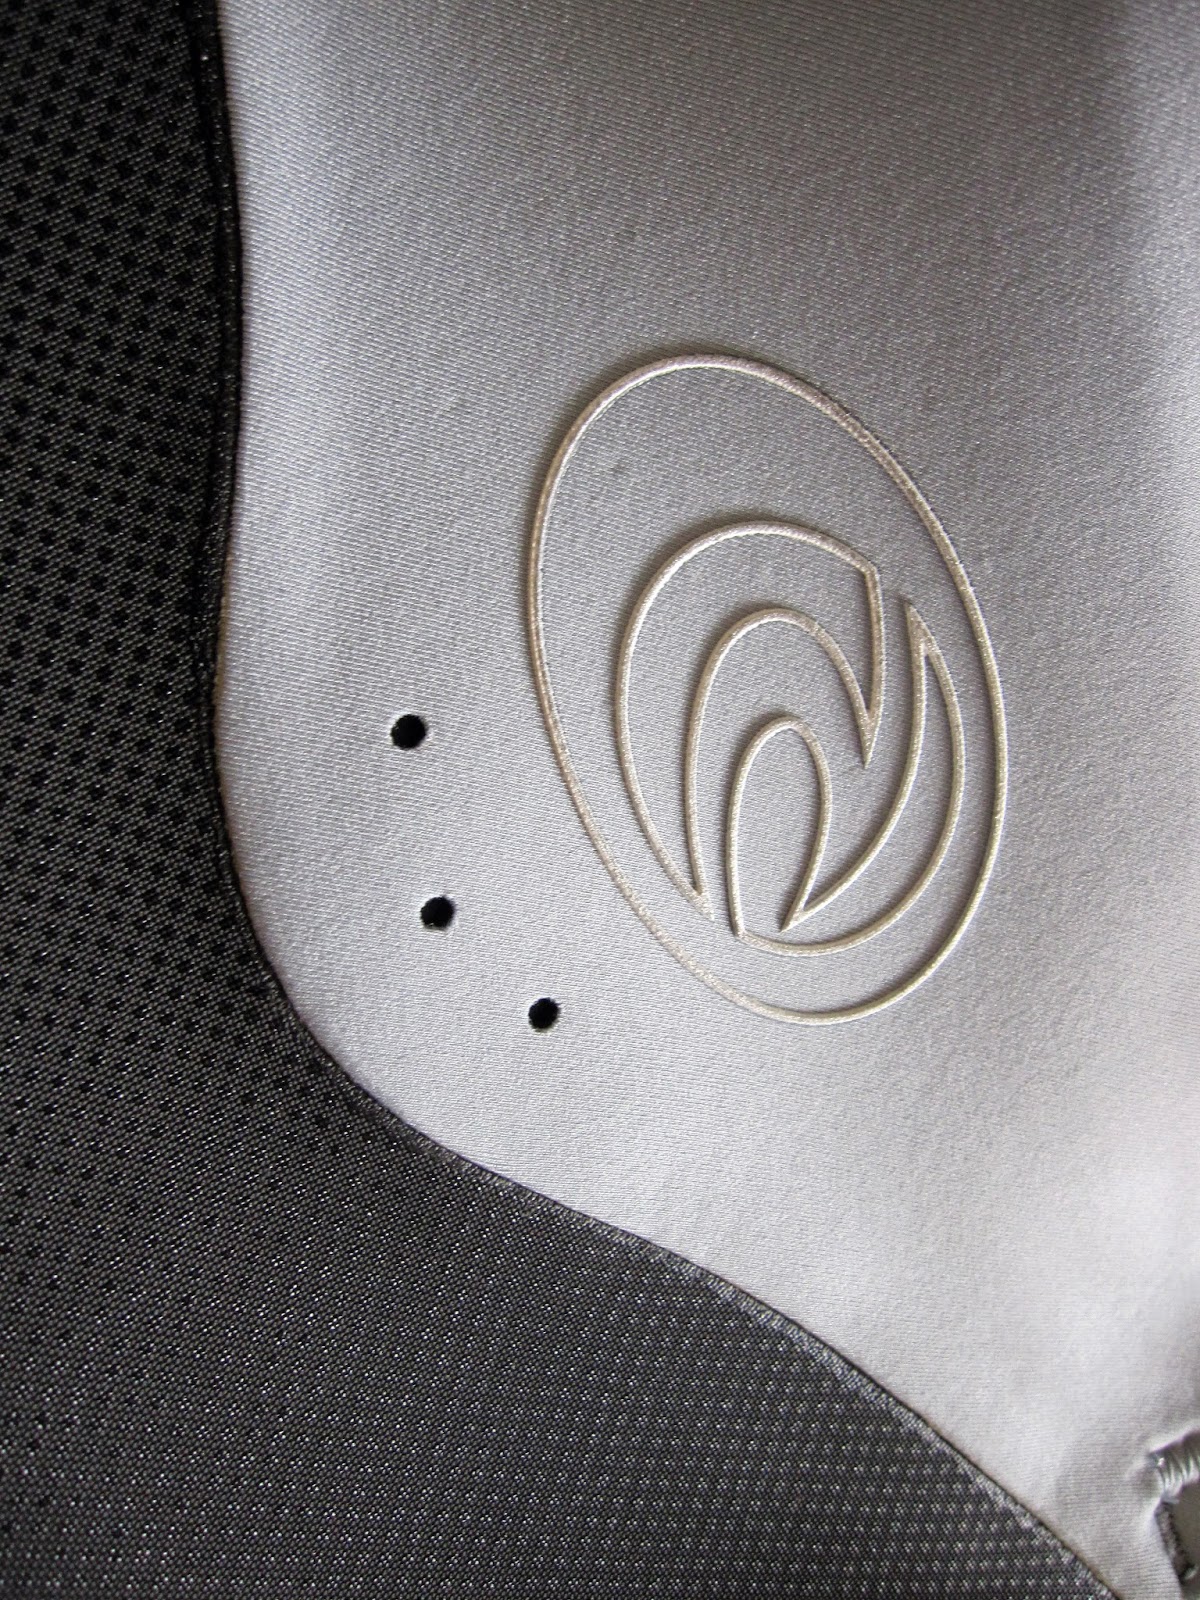
These are the drain holes for the chest zip section. They're present on the front and back. 

I really want to take this into the surf and test it properly for flushing, etc., but need to try out the smaller size first (if I can find one in stock anywhere) to see if it's a better fit. When(if) I eventually do, I'll update this review with more info!


Overall, a nice-looking wetty that's fun and v.v. warm, but could do with more form-fitting and flattering shaping.

UPDATE:  It turned out that the shop selling the wetsuit didn't quite get the sizing right. So the 8 was way too big. I went for a 6 (which on Ripcurl's site matches a UK 8, plus I'm 5'5"), but now that I've worn it out, I wish I'd gone for the 4. I've tries it out in the surf several times now and I can say...

Cons: The neck seal could do with being tighter.
As I'd feared, the thick fabric bunches behind the knees. Ergh. It can rub a bit after a while. Could definitely do with being thinner on the lower legs.
It doesn't dry thaaaat quickly, but after an hour or two on a sunny say it's not disgusting to put back on.
Getting the neck part back over my head to get it off is really tough (and I need help with it).
Go a size smaller than the Ripcurl size guide recommends.

Pros: The suit is amazingly warm. Really, beautifully warm.
Getting the rest of the suit off is easier than it was with my O'Neill when it was new.
It looks cool.

Sunday 15 September 2013

Converting a panel van to a windsurfmobile

The boyfriend and I (more accurately the boyfriend, since he did most of the paying) acquired a van for the purposes of windsurfing. We wanted something to carry all the kit, get changed in when it was particularly horrid outside and even something to sleep in over a windy weekend. While we were at it, we thought we might as well go the whole way and do enough work on the interior to get it reclassified as a motorhome (they are a bit cheaper to insure than commercial panel vans, and can be driven at higher speeds). So... here's the picture book story:

This is what we started with: a blue, LWB Renault Trafic, complete with magic numberplate. It still doesn't quite fit in my parking space. Oh well.


The first job was getting a side window put in. We had this done professionally as our DIY skills were nil before we started this, and taking a saw/other massive cutting implement to the side of the van was a bit too daunting!

The second job was removing the bulkhead. It was mostly held in with simple torx bolts, except for two weird blind-head thingies. These had to be pyoinged off with a hammer and screwdriver. Here's the man in action, or doing his best Blair Witch man-in-the-corner impression.


Free!


After that, we cleaned out the interior and made sure to cover any scratches/bare metal with primer and paint. Though we didn't want any of the shell to get wet from all the windy gear, there was/is always the chance of a leakage through whatever protective layers we install, so we thought a bit of rust protection at this stage was a good idea.


Next, we added some sound-deadening sheets to the panels in the hope of dulling the chassis vibrations. 


We probably could have added more sound-dead stuff, but we drove it around and it was already pretty quiet, so we left it at this...


As you can see, we employed stringent safety measures in order to protect eyes and lungs. This is very important when cutting down pieces of Celotex(tm) insulation. 


For some of the build, I took up this position and 'protected the manly tools'


We put down some battens using a combination of bolts and flexi-glue. The ply lining would later be anchored to these battens and the van skeleton. Some of the insulation has already been glued to the ceiling here:


Then came more insulation...


We plumped for the plastic, recycled-bottle stuff. It's supposed to be good at not retaining water. However, it also seemed to be out of stock at all branches of B&Q, so we lined most of the van before running out in one corner. That bit had to be left unfinished for a while :(

Anyway, the floor battens went in next, complete with bits of insulation and the first layer of ply on top. We'd worked out at this point that space (especially vertically) was going to be really tight with our plan, so we kept the floor layer relatively thin.


More insulation on the back doors...


Next came the ply lining and the first bits of wiring. 


The first bits of wood for what would become the bench.... The van stayed in this state while we took it down to Wales for a bit... 


When we got back it was time to build some more! Here the basic frame of the bench has been built, and a load of kit has been inserted under it to check if it will all fit - two boards, three sails and two booms to start with...


More bench:


This is all Tim's creation - the bed will pull out like this when it's done:


Ply-ing the ceiling could start, and the light holes could be put in. We decided to go for LED recessed lights - they use very little power and don't get too hot, so hopefully won't set fire to the carpeting that'll be added later.


Finally, the extra insulation arrived, and the other side of the van could be lined. A retaining wall for the windy kit was also added. There was a lot of glue holding various bits in place where screws weren't possible (note props)!


The kit area needed to be waterproofed fairly early on as we were using the van for outings even as it was a work-in-progress. In went some vinyl...


More of the kit area was waterproofed - we now have three boards (two fs, one w), seven sails, two booms in there:


Next, some MDF was wrapped around the curvy bit of the bench, some vinyl put on the floor and the rear sections constructed. 


Then came the upholstery and some wood veneer added to the front of the MDF. We waterproofed it using some 'special' oil. Actually, it's more splash-proof than anything else, since water could still potentially get underneath it and soak upwards. Should be enough to withstand us getting changed out of wetsuits all over it though. There were also more bits built at the rear. Unfortunately, I didn't take many more pictures of this stage, which would have shown Tim's ingenious board-insertion system. More about that later...


More upholstery...


And more...


I made a fin storage system for one of the rear doors...


This is how the rear looked. We have a water and waste tank under the sink/hob on the left, and the waterproof kit zone on the right. 


The lights had been dangling and swinging around and hitting stuff for too long by this stage... it was finally time to carpet the ceiling and install them!


This is the hob area. There's a cupboard underneath for plates and that sort of stuff. We put a bit of formica on the top and sealed everything in. The grey flat stuff around is vinyl (wipe clean!) so we'll have to wait and see how that holds up, but I thought it might fare better than steamed, pan-spit-fat carpet. 


More carpeting...


And more carpeting! This is how it looks with the bed pulled out:


Lights on...


I made windy carpet art!


Then came many hours of messing around with silicone sealant and skirting board. There's a compressor cool box in the corner and an electrics cupboard behind that. The leisure battery is hiding under the passenger seat.


Hob and sink...


Kitchen zone :)


Deep in the electrics cupboard:


This is what happens if you press the PARTY button:


This is the rear, complete with a spongy bit to separate wet zone from dry!


And with tanks:


This is Tim's board insertion system in action! Because the wave board that has to fit down here is bendy (but not quite bendy enough), it's tricky to get it lying along the side of the van when the chassis door frame (and our wooden structure) is in the way. Soooo a couple of side doors open up to give greater access to the side portion of the wet zone and allow for the correct angle of entry. Fnarr.


Then there's the second wave board, which lives at the top. To get to this, we have two flaps that open downwards, comme ca:


Going in:


And here's the rear, full of EVERYTHING (okay, we took the gas cannister out, we didn't need it for this particular trip)! In here we have.... 

two wetsuits
two harnesses
two booms
four masts
seven sails
two freestyle boards
two wave boards
eight fins
three extensions
two mast feet
four wetsuit boots
various screwdrivers and other miscellany

Ready for (just about) anything :)


Oh, and here's the cupboard for all of the kitchen-y stuff.


There's still the table to attach before we can get the van reclassified, but that'll happen sooooon!


MOAR IMAJS: